
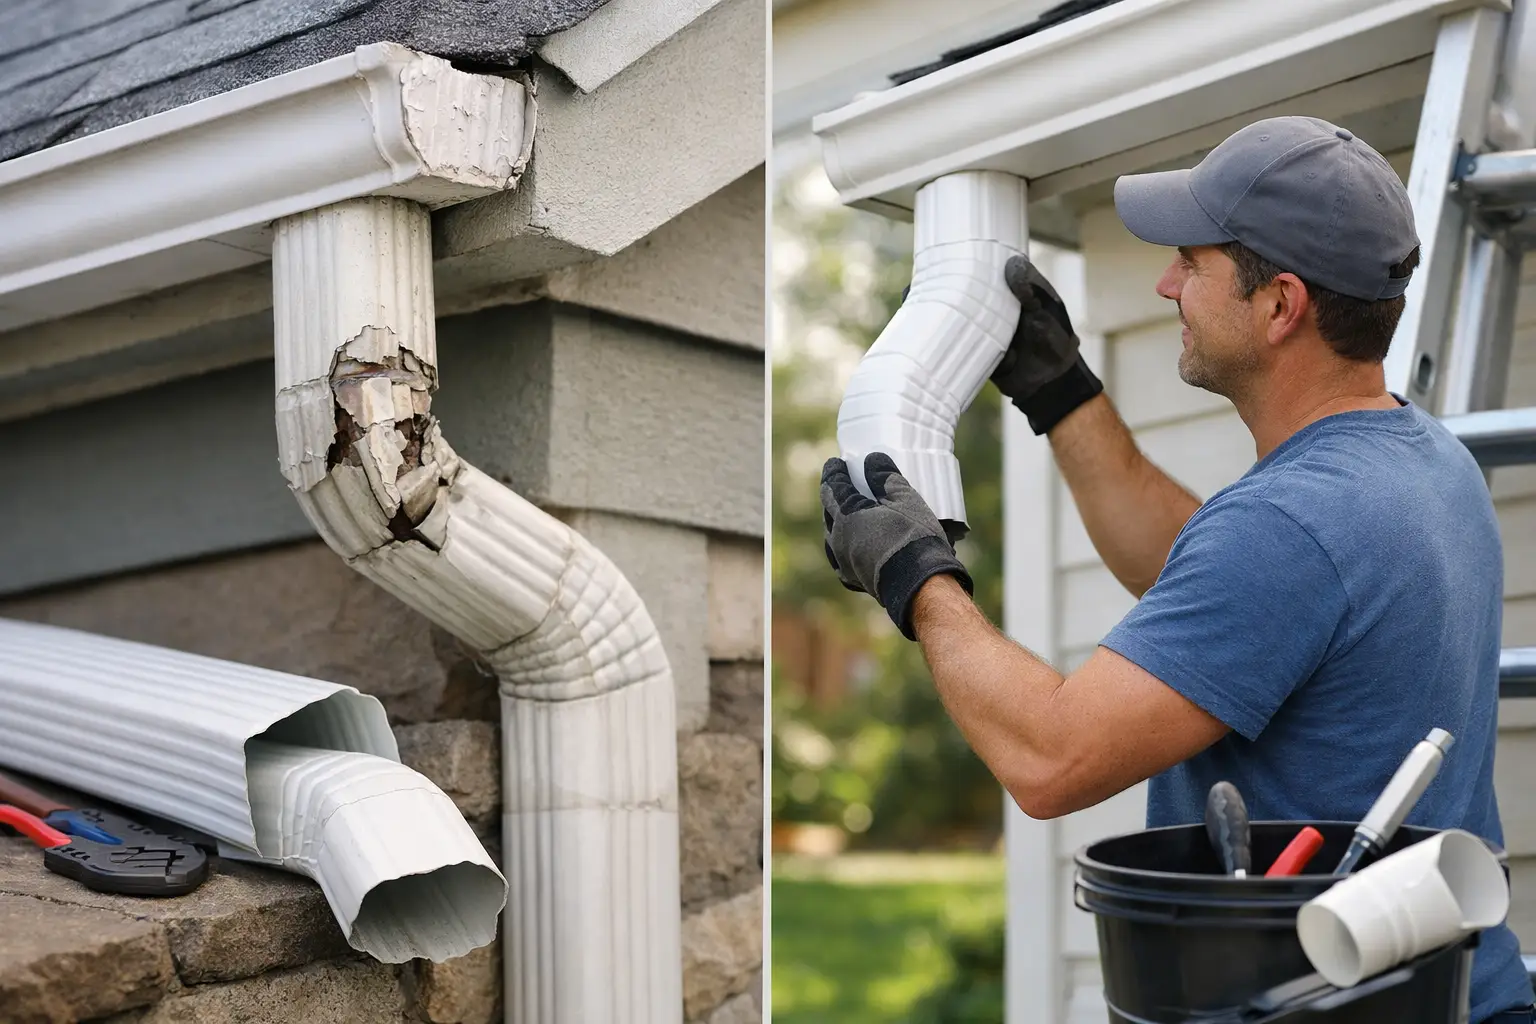
A downspout can look like a minor part of the gutter system until a Central Florida downpour sends water over the edge, against the siding, or straight toward the foundation. This guide to replacing damaged downspouts explains what homeowners should look for, when a replacement is the right fix, and how to make sure water is directed where it needs to go.
Downspouts do one job, but it is a critical one: they move water from the roofline to a safe discharge point. When one is cracked, crushed, loose, clogged, or poorly positioned, even a well-functioning gutter can overflow. Acting before the next heavy storm can help prevent staining, wood rot, washed-out landscaping, and moisture problems around the home.
Know When a Downspout Needs Replacement
Some downspout problems can be corrected with a cleaning, a new fastener, or a small sealant repair. Others call for replacing the damaged section or the entire downspout. The condition of the material and the cause of the damage matter more than appearance alone.
Look closely after rainfall. Water running down the exterior wall, spraying from seams, pooling at the base of the downspout, or backing up at the gutter outlet are all signs that something is not working correctly. A downspout that has separated from the gutter, pulled away from the wall, or been flattened by impact will not carry its intended volume of water.
Replacement is usually the better choice when the metal is badly bent, rusted through, split along a seam, or repeatedly coming apart. It also makes sense when the downspout is undersized for the roof area or discharges too close to the home. Patching a weak section may stop a visible drip for a while, but it will not solve poor drainage or a system that is no longer securely supported.
Check for the Problem Behind the Damage
Before installing a new downspout, identify why the old one failed. A loose elbow may point to missing straps or fasteners. Dents near ground level may be caused by lawn equipment, foot traffic, or a poorly placed extension. A seam that leaks during every storm can result from improper overlap, loose screws, or water backing up from a clog.
Also inspect the gutter above the damaged section. If the gutter is holding standing water, sagging, or overflowing before water reaches the outlet, a new downspout alone will not correct the issue. Leaves, roof grit, and nesting material can block outlets and elbows, especially after periods of frequent rain. Clear the system first so you can tell whether the water is moving freely.
Guide to Replacing Damaged Downspouts Safely
For a simple, accessible replacement, homeowners may be able to handle the work with basic tools. However, working from a ladder near rooflines carries real risk, and seamless gutter systems can require precise fitting. If the downspout connects to a damaged gutter outlet, if the gutter has pulled loose, or if multiple sections are failing, professional service is often the safer and more durable option.
Start by measuring the existing downspout. Measure its width and depth, not just its visible face, because common rectangular sizes are not interchangeable. You will also need to note the path from the gutter outlet to the ground, the number and direction of elbows, and where the bottom section should discharge.
Choose a replacement material that matches the existing system whenever possible. Aluminum is common for residential gutters because it is lightweight, resists rust, and comes in colors that can match the gutter. Vinyl can be less expensive but may become brittle in harsh sun or crack after impact. Galvanized steel is durable, but damaged coatings can eventually rust in Florida’s humid conditions.
With the replacement pieces ready, remove the old downspout carefully. Take out the straps securing it to the wall, then remove screws from the elbows and outlet connection. Keep the pieces in order if they will help you confirm the bend directions and lengths for the new assembly.
Fit the upper elbow to the gutter outlet first. Downspout sections are designed to overlap in the direction water travels, so the upper piece should feed into the lower piece rather than allowing water to catch on an outward-facing seam. Secure each connection with appropriate gutter screws. Avoid overdriving screws, which can distort thin aluminum and create a weak connection.
Attach wall straps at secure intervals to keep the downspout straight and stable. The exact spacing depends on the material, height, and local conditions, but the goal is simple: the downspout should not sway, pull away from the wall, or rely on the elbows alone for support. Keep fasteners out of vulnerable areas where possible, and avoid forcing screws into deteriorated trim or siding.
Finish by adding the lower elbow and extension or splash block needed to direct water away from the foundation. In many cases, water should discharge several feet from the home, but the best arrangement depends on grading, walkways, planting beds, drainage restrictions, and where water can safely flow. Never direct roof runoff toward a neighbor’s property or a location that stays wet after rain.
Make Sure the Size and Layout Fit the Home
A replacement downspout should do more than fill the space left by the old one. It needs enough capacity for the gutter and roof area it serves. During Orlando’s intense summer storms, a small or restricted downspout can become overwhelmed quickly, particularly on larger roof planes.
Most homes use rectangular downspouts paired with K-style gutters, but size selection should reflect the roof’s drainage demand. Adding another downspout may be more effective than installing a larger one when a long gutter run collects water from a broad section of roof. This is especially true if water tends to surge past one outlet during heavy rain.
Placement matters just as much as size. A downspout at the end of a gutter run is common, but some rooflines benefit from an additional outlet closer to the center. The right layout should move water efficiently without creating unnecessary seams, awkward turns, or discharge points near doors, driveways, and foundation corners.
Do Not Ignore the Bottom of the Downspout
The last few feet of the system determine where the roof runoff ends up. If soil is eroding below the elbow, mulch is washing away, or water sits against the slab, consider a properly positioned extension, underground drainage connection, or another drainage solution suited to the property.
Extensions need occasional attention too. A flexible extension that is crushed, disconnected, or pointed uphill will not solve the problem. Rigid extensions generally look cleaner and hold their shape better, while buried drainage can keep water out of sight but must be installed with the proper slope and a clear outlet. The best option depends on the lot and how water naturally moves across it.
Test the Replacement Before the Next Storm
Do not wait for a thunderstorm to find out whether the repair worked. Once the downspout is secured, use a garden hose to run water into the gutter above it. Watch the outlet, elbows, seams, and lower discharge point.
Water should enter the downspout without backing up, stay inside each connection, and exit far enough from the home to avoid pooling. If water leaks at a seam, check that the sections overlap correctly and that the screws are holding the pieces firmly. If the gutter overflows during the test, inspect for a clog, improper gutter pitch, or insufficient outlet capacity.
This is also a good time to look for water marks on fascia boards, siding, and soffits. Those marks may indicate a separate gutter issue that has been developing slowly. Downspout repairs work best when the full gutter system is clean, secured, and able to move water toward each outlet.
When to Call a Gutter Professional
A professional inspection is worthwhile when damage is recurring, downspouts are pulling gutters out of alignment, or water continues to collect near the home after a replacement. It is also the practical choice for two-story homes, complex rooflines, custom-color components, and seamless K-gutter systems that need adjustment at the outlet.
Precision K-Gutters can assess whether the problem is limited to a damaged downspout or connected to clogged gutters, loose hangers, poor slope, or inadequate drainage. Clear recommendations and a clean repair help homeowners avoid replacing parts that are not actually causing the problem.
A properly fitted downspout is easy to overlook, which is exactly how it should be. After the next hard rain, the only thing you should notice is that water is moving away from your home instead of creating a new problem.
Leave a Reply